Why Your Neighbor's Windows Are Always Cleaner Than Yours: 6 Reasons Revealed
March 12, 202
Jon Christensen
Keeping your windows crystal clear isn’t a one-time chore – it’s a lifestyle.
Keeping your windows crystal clear isn’t a one-time chore – it’s a lifestyle.


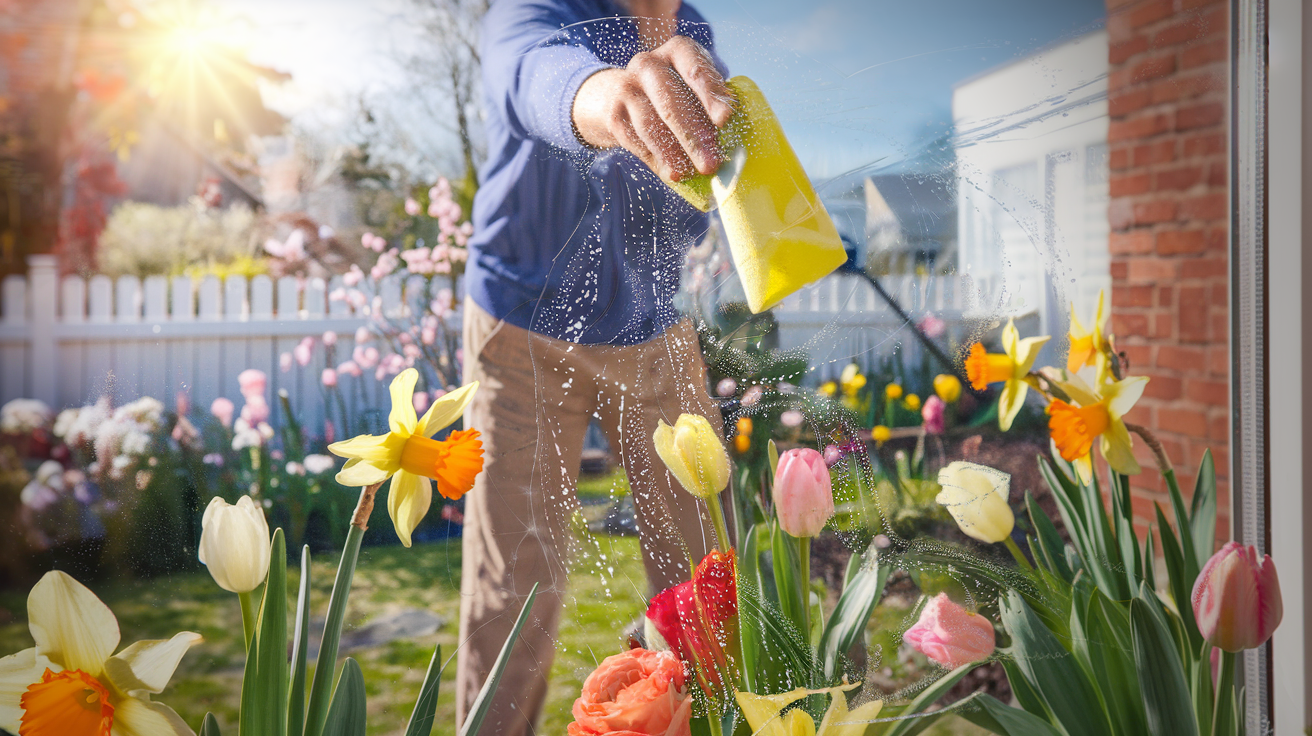
Ever notice how some homes always have sparkling, streak-free glass? These homeowners aren’t magicians; they simply follow a set of consistent habits. Below, we dive into six key habits of people who always have clean windows. Each habit includes why it’s essential, how to do it right (with pro tips), and pitfalls to avoid. Embrace these routines – especially with spring cleaning around the corner – and enjoy a brighter, cleaner home year-round.
1. They Make Window Cleaning Part of Their Routine
People with perpetually clean windows treat window cleaning as a regular routine, not a once-a-year afterthought. Why it’s essential: Regular cleaning prevents grime buildup that can etch glass or cause stubborn stains over time. In fact, experts recommend a thorough window cleaning twice a year, in spring and fall, when milder weather helps achieve better results. Spring cleaning washes away winter’s dust, dander, and road salt so your panes are pristine for summer sun. A fall cleaning removes pollen and dirt from summer and lets in more light during short winter days. Consistent upkeep also means each session is easier and faster, since you’re never battling layers of hardened grime.
How to do it right: Mark your calendar for seasonal deep cleans – for example, every March and October – to tackle exterior windows. Many homeowners pair this with other seasonal chores (like gutter cleaning or swapping out screens and storm windows). For interior windows, a lighter cleaning monthly or as needed keeps them smudge-free. High-traffic areas (patio doors or kids’ fingerprint zones) might need quick touch-ups more frequently. By building window cleaning into your normal housekeeping schedule, it becomes a manageable task rather than a marathon.
Expert tip: One homeowner and cleaning pro swears by doing a thorough spring window clean every year: “This way, the dust and dander that built up over winter can be cleared away and the windows will be in great shape to deal with summer sunlight,” he says. Figure out a schedule that suits your climate and home, and stick to it. Your future self – and your windows – will thank you!
Common mistakes to avoid: Don’t wait years between cleanings. Skipping regular sessions allows mineral deposits from rain and sprinkler water to accumulate, making glass cloudy and harder to clean later. Neglecting windows until they look visibly dirty might force you to use harsher chemicals or scrubbing that could have been avoided with routine care. Instead, adopt the “little and often” mindset that people with immaculate homes live by.
2. They Pick the Perfect Time to Clean
Timing is everything when it comes to streak-free windows. People who always have clean windows know to choose the right day and time for the task. Why it’s essential: If you clean windows under a blazing sun or on a gusty day, you’re setting yourself up for frustration. Direct sun can cause your cleaning solution to evaporate too quickly, leaving dried-on suds and streaks before you can wipe them off. Strong winds, on the other hand, can kick dust right back onto your wet windows or even blow dirt onto freshly cleaned glass. The result? Stubborn streaks and spots that defeat the purpose of your effort.
How to do it right: Choose a cloudy, mild day or aim for early morning/late afternoon hours for outdoor window washing. Overcast light is actually your friend here – not only does it prevent rapid drying, but it also makes it easier to see any streaks you might have missed (no glare to hide them). If the forecast is windy or very hot, reschedule if you can. For indoor windows, close the blinds halfway while cleaning so the sun isn’t heating the glass directly. You can also tackle insides in the evening. Essentially, avoid cleaning in direct sunlight or extreme temperatures to give yourself more working time with the cleaner before it dries. And if you have a lot of windows, do them in batches – room by room or side by side – so you’re never racing the sun across your home.
Expert insight: “Early morning or late afternoon is best, especially for exterior windows,” advises Alicia Sokolowski, a professional cleaning expert. “Overcast days are ideal. This prevents the sun from drying your cleaning solution too quickly before you can wipe it off, which reduces streaks.” In short, pros clean “when the weather is on your side.”
Common mistakes to avoid: Many people make the “sunny day mistake” of washing windows when it’s bright and warm out, only to be frustrated by streaking. Another timing faux pas is trying to clean windows during very pollen-heavy times – if everything is coated in yellow dust, your freshly cleaned window might get dirty faster. If possible, wait until pollen levels subside a bit in spring. By timing your window cleaning wisely, you’ll get better results with the same effort.

3. They Prep Windows Before Getting Them Wet
Walk into the home of someone with spotless windows, and you might catch them doing something before spraying cleaner: dusting! A key habit is that they always prep the window area first. Why it’s essential: Dry dust, cobwebs, and grit tend to accumulate on window sills, tracks, frames, and screens. If you skip straight to spraying glass cleaner, you’ll just create a muddy mess by smearing that dirt around. Even worse, scrubbing a dusty, gritty window can scratch the glass. Proper prep ensures you’re actually cleaning the glass, not pushing debris from one spot to another.
How to do it right: Start by dusting the window, frame, and sill thoroughly. Use a vacuum with a brush attachment or a microfiber duster to lift away loose dirt and dead bugs from corners and tracks. Don’t forget the top frame and window ledge where dust loves to hide. For exterior windows, rinse the glass with plain water (a quick spray from the hose works wonders) to wash off loose dirt before you apply any cleanser. This simple step can prevent tiny scratches and muddy runoff.
Next, address the window tracks and frame grooves – a notorious source of hidden grime. A lot of gunk can hide in these areas, and if it mixes with your cleaning solution, it can drip onto the glass as an unsightly sludge. To tackle tracks: sprinkle a little baking soda in the crevices, add a few drops of vinegar, and scrub with an old toothbrush to dislodge grime. Wipe up the residue with a damp cloth. Getting the frame and tracks clean first means no dirty surprises will seep onto your glass later.
Importantly, remove or clean your window screens regularly. There’s no point in having gleaming glass if your screens are caked with dust – every time it rains or you open the window, that dirt can transfer to the glass. If screens are removable, pop them out and hose them down. Wash with a soft brush and soapy water if they’re very dirty, then let them fully air dry before reinstalling. For a quick touch-up when you don’t want to remove screens, a sticky lint roller can lift dust from the screen’s surface – a clever little shortcut. As cleaning pro Tommy Vannelli reminds, “Don’t forget to remove the screens and rinse them with warm, soapy water… Let them air dry before putting them back”. Clean screens not only keep your windows clear, but also improve airflow and indoor air quality.
Expert tip: Ray Brosnan, a property maintenance expert, emphasizes that not dusting first is the biggest mistake people make with windows. “Your windows need to be free of dust, debris, and other surface-level dirt before you start applying water or cleaning solutions; otherwise, you’re just moving dirt around and not actually solving the issue,” he says. Professionals often spend as much time prepping as they do polishing the glass. Adopting this habit at home will instantly step up your window-cleaning game.
Common mistakes to avoid: Skipping the prep is number one – never spray cleaner on a dirty, dusty window. Also, avoid using a soaking wet rag on dusty tracks (dry brush or vacuum first, or you’ll create muddy streaks). And if you removed parts like screens or sashes, make sure they’re completely dry and free of debris before putting them back, so you don’t undo your hard work. Taking a few extra minutes to prep can save you from annoying streaks and make the cleaning solution far more effective.
4. They Use the Right Tools and Products for the Job
Step into the cleaning caddy of someone with perpetually gleaming windows, and you’ll notice it’s stocked with proper tools – no cheap paper towels or random t-shirts for these folks! Using the right equipment and cleaner is a habit that yields big results. Why it’s essential: The correct tools (like high-quality microfiber cloths and squeegees) actually make window cleaning easier and more effective, helping you get a streak-free finish with less elbow grease. The wrong tools (like paper towels or newspapers) can leave lint, streaks, or even scratches behind. Similarly, a good glass cleaner or gentle DIY solution will cut through grime without leaving residue, whereas using the wrong product can cause haze or damage window coatings.
How to do it right: First, ditch the paper towels. Instead, invest in a few microfiber cloths specifically for glass cleaning. Microfiber is lint-free and grabs dirt and dust effectively, so it won’t leave bits of fluff on your nice clean window. Keep one cloth for washing and another for drying/polishing. Also, use separate sets of cloths or sponges for indoor vs. outdoor cleaning – this way, you’re not dragging outside grime onto your interior glass (people with immaculate homes are often meticulous about preventing cross-contamination). After each use, wash and dry your microfibers so they’re ready for next time.
Next, the hallmark of a window-cleaning pro: the squeegee. A quality squeegee with a rubber blade is a game-changer for achieving that streak-free shine. It swiftly removes all the water and cleaner from the glass, preventing those telltale drip marks. Use a squeegee on larger panes or mirrors in your home – start at the top and pull down in one smooth motion, wiping the blade with a towel between passes. As cleaning expert Arman Khalili notes, a professional-grade squeegee is essential if you want to avoid streaks or lint trails. It also speeds up the drying step significantly.
Using a squeegee like a pro can make a huge difference in your results. A good squeegee removes water and soap from the glass, preventing streaks and spots.
Now, consider your cleaning solution. Many folks with perpetually clean windows skip harsh chemicals and go for a simple homemade mix. A classic choice is equal parts white vinegar and water in a spray bottle – it’s natural, effective on grime, and leaves a streak-free shine. For very dirty windows (say, after a storm or kitchen grease on a window near the stove), a few drops of dish soap in warm water works wonders to cut through the film. Follow up with a rinse or a vinegar-water spritz to clear any soap residue. The key is that they avoid using overly strong cleaners or too much product. Over-applying cleaner can actually cause streaks if not wiped properly, and certain ammonia-based cleaners might not be suitable for windows with special UV coatings. So, stick to trusted glass cleaners or gentle DIY solutions unless your window manufacturer says otherwise.
Expert insights: Interestingly, many professional window cleaners stick to basic supplies. “Most professional window cleaners just use Dawn and warm water,” shares cleaning expert Derek Christian, referring to a mild dish soap. The soap helps break the surface tension of water and lubricates the glass for the squeegee to glide smoothly, which helps avoid streaks. In other words, fancy bottled cleaners aren’t always necessary – a simple solution and good technique often beat a pricey product. Also, pros recommend using plenty of cleaner (don’t be stingy) to ensure the glass is fully wetted and dirt is dissolved, then removing it thoroughly. The right amount of cleaner, coupled with the right tools, gives the best outcome.
Common mistakes to avoid: Using the wrong cloth is a big no-no. Old T-shirts or cheap paper towels can leave lint or even scratch certain glass coatings. Likewise, never use abrasive scrub pads or steel wool on glass, unless it’s super-fine grade 0000 steel wool used very carefully on mineral spots – anything harsher can etch the glass. Avoid mixing cleaning concoctions randomly; for instance, don’t use vinegar on a tinted or film-coated window without checking if it’s safe. And don’t forget to replace your squeegee blade when it gets worn – a nicked or cracked rubber blade will leave lines of water. People with consistently clear windows keep their tools in top shape, so they’re ready to go when it’s cleaning time.

5. They Master the Technique for Streak-Free Shine
Having the right gear is half the battle – knowing how to wield it is the other half. Those who always have clean windows have developed a few technique tricks that guarantee a gleaming finish every time. It’s not magic, just good habits in action. Why it’s essential: Even with great tools, poor technique (like wiping haphazardly or using too much force) can leave you with streaks, smudges, or even damage. Adopting the methods the pros use ensures you get maximum sparkle with minimum effort, and it protects your windows in the long run.
How to do it right: The number-one technique habit is working top-to-bottom on the glass. Always start cleaning at the top of the window and work downward. This way, any drips will fall onto areas you haven’t cleaned yet, so you’re not dirtying a spot you just polished. When using a squeegee, begin at the top left (or top right if you’re left-handed) and pull in a smooth stroke to the bottom, then repeat slightly overlapping each stroke. Keep a lint-free cloth in your other hand to quickly wipe the squeegee blade after each pass – this prevents water lines. If you’re using a cloth instead, use one in each hand: one damp with cleaner to wash, the other dry to immediately buff behind.
Another habit of the streak-free elite: vary your wiping direction on the final pass. For example, some pros recommend wiping the inside of windows horizontally and the outside vertically (or vice versa). The idea is if you do see a streak, you can tell which side of the glass it’s on by the direction! Even if you don’t follow that exactly, it helps to use both circular motions and then a straight-line finish when wiping. Start by scrubbing in small circles to dislodge spots, then do one final sweep with the cloth or squeegee in a consistent vertical or horizontal line to eliminate any swirl marks. This two-step approach ensures a thorough clean and a clear finish.
Be mindful of pressure and patience. It’s a habit to let the cleaner do the work. Once you spray your cleaning solution or apply your soapy water, give it a moment to dissolve the dirt (especially on grimy exterior windows). Then wipe – gently. Avoid pressing too hard on the glass; pushing down with a lot of force won’t make it any cleaner and could even scratch the glass if any grit is present. Use a light, even pressure with your cloth or squeegee. If a spot is stubborn, apply a bit more cleaner and try a gentle scrub with a softer tool (like a nylon scrub pad or the sponge side of a squeegee) rather than grinding away with brute force.
They also clean in manageable sections. If you have a huge picture window, don’t spray the whole thing at once. Tackle the top half, then the bottom half, or divide it into a few vertical sections. This prevents the cleaner from drying on the glass before you get to it. It’s the same principle as choosing a cloudy day – you always want to keep that “wet edge” as you work, so you’re wiping off liquid, not scrubbing at dried-on solution.
Finally, the finishing touches: Once the glass looks clean, true clean-window enthusiasts will often do a quick final buff. They might lightly buff the pane with a dry microfiber cloth, a piece of crumpled newspaper (an old-school trick some still swear by), or even a chalkboard eraser for a flawless finish. A clean, dry chalkboard eraser gently glides over the glass and can remove any last faint streaks. Another great secret tool? Coffee filters. These are lint-free and absorbent, making them perfect for a last swipe on the glass to ensure no water spots or lint remain. It might sound quirky, but coffee filters won’t leave fuzz behind and can give a final polish to the pane.
Expert tip: If you notice a streak that just won’t quit, breathe on it (like you would to fog up a mirror) and then wipe with a clean microfiber. The slight moisture from your breath can help buff it out without needing to re-spray cleaner. Also, for exterior mineral spots that persist (like sprinkler water spots), try rubbing gently with super fine #0000 steel wool on wet glass – very lightly – then rinse and squeegee. Pros use this trick for tough grime, but always test a tiny area first and avoid if your windows have a special coating.
Common mistakes to avoid: A big mistake is using the same rag for the whole job – once a cloth is saturated or dirty, it will start streaking. Swap it out for a fresh one as needed (that’s why having a few clean cloths on hand is important). Don’t forget to wipe the edges and corners of the glass where solution can accumulate. A quick swipe with a dry cloth along the window edges and sill at the end will catch any stray drips. And resist the urge to use your hand or finger to dig at a spot; oils from your skin can transfer to the glass. Instead, use a proper tool (like a plastic scraper or the aforementioned steel wool for tough spots, or simply re-spray and wipe). By mastering these techniques, you’ll notice your windows not only look professionally cleaned but also stay cleaner longer (since no oily residue or lint is left to attract dust).
6. They Don’t Overlook the Surroundings (Screens, Blinds & Beyond)
One secret of folks who always have clean windows: they know a window isn’t just the glass. The surrounding elements – window screens, sills, frames, and even the blinds or curtains – all play a role in overall window cleanliness. Tending to these often-overlooked areas is a habit that keeps windows looking immaculate and bright. Why it’s essential: Imagine scrubbing your window to perfection, only to lower a dusty blind or open a filthy screen over it – all that dirt can transfer right back to your clean glass. Dirty tracks or sills can also get wet in the rain and splatter grime onto the pane. By expanding their cleaning routine to include window adjacencies, these savvy homeowners ensure a complete clean that lasts. Plus, clean window treatments and sills contribute to a healthier home (fewer allergens like dust and pollen) and a more polished look.
How to do it right: We already covered cleaning the window screens and frames in the prep stage (Habit #3). In addition to that, make it a habit to clean your window treatments whenever you tackle the windows. This means dusting or washing blinds, shades, and curtains regularly. For blinds, a handy trick is to use a pair of tongs wrapped with microfiber cloths (secured with rubber bands) to gently clamp and wipe each slat. This grabs dust from both sides of the blind slat in one go. Alternatively, vacuum blinds or shades using a brush attachment, or simply wipe them with a damp cloth if the material allows. Fabric curtains can be vacuumed with the upholstery attachment to remove dust. Many people take down heavy drapes for a thorough wash or dry clean during spring cleaning. The goal is to prevent any dust bunnies on a curtain or blind from undoing your window cleaning efforts the next time a breeze comes through.
Don’t forget the window sill and ledge – after cleaning the glass, give the sill a final wipe down. Crumbs, dead insects, or dust often accumulate there and can blow around. A quick pass with a damp cloth keeps this area clean and prevents debris from being lifted onto the window or into your home. If you notice any mold or mildew starting in the corners of windows (especially in cooler damp seasons), address it immediately with a vinegar solution or mild cleaner. People with pristine windows are proactive about these details, so small issues don’t become big problems.
Don’t forget about your window blinds and shades. Cleaning window treatments (like wiping down blinds) whenever you wash your windows helps keep dust from transferring to the glass later.
Another smart habit is to occasionally apply protective treatments. In rainy or dusty climates, some homeowners treat their exterior windows with a rain-repellent product (the same type used on car windshields) to help water and dirt roll off more easily. It’s not something you need to do often, but doing this before a wet season can keep windows cleaner longer, meaning less frequent need for deep cleans. Think of it as rain-proofing your view. Just be cautious: if you do use a specialty coating, follow the instructions and avoid cleaners that could strip it (for example, ammonia can degrade certain water-repellent coatings).
Finally, those with the cleanest windows tend to finish the job properly. This means making sure everything is dry (moisture left sitting can attract mildew or dirt) and returning items to their place only when fully clean. They’ll wait until screens are dry to put them back, and ensure that any cleaning solution that dripped on the floor or sill is wiped up. It’s a comprehensive approach: the window glass, frame, sill, screen, and coverings all get attention. This holistic habit is why their windows don’t just look clean on day one, but stay cleaner in the weeks to follow.
Expert insight: Professional cleaners often bundle window cleaning with related tasks. When hired to do windows, they frequently clean the screens and wipe the sills as part of the service, because they know it’s necessary for the best result. They might even offer blind cleaning add-ons. Take a page from their book and pair these tasks together at home. It might add a few extra minutes, but the payoff is huge in maintaining that crisp, clear view.
Common mistakes to avoid: A common oversight is cleaning a window but leaving the blinds dirty, or skipping the screen because it looks “good enough.” Even if the glass is spotless, a dingy screen can make the whole window look dull and will soil the glass sooner. Also, avoid spraying cleaner directly onto blinds or wood frames – spray your cloth instead, to prevent excess moisture on wood or fabric. And if you removed any hardware or window components to clean (screens, window cranks, etc.), be sure to put them back securely to avoid any gaps that let in dirt or drafts. By not overlooking these details, you extend the life of your clean windows and the time between major cleaning sessions.

Sparkling windows aren’t a stroke of luck – they’re the result of smart habits and routines. To recap, people who always have clean windows plan regular cleanings, choose the right conditions, prep surfaces first, use top-notch tools (and know how to use them), and pay attention to details like technique and surrounding areas. They also leverage expert tricks – from the timing of day to the final buff – to get that professional-level shine. The great news is that none of these habits are out of reach for the average homeowner. With a friendly approach and a little practice, you can incorporate these routines into your own household schedule.
Remember, clean windows do more than just look nice – they let in more light, boost curb appeal, and even improve your mood (who doesn’t love a clear, sunny view?). So as you embark on your next cleaning spree – perhaps this spring – give your windows the star treatment. Start adopting these six habits one by one. Before long, you’ll be the homeowner whose windows are always clean, prompting your neighbors to ask: “What’s your secret?” Just smile and share these tips! Happy cleaning and enjoy the brilliant, streak-free views.


.png)